Below you will find an FAQ to help answer any questions you have about using and understanding your degree audit. If you require additional assistance, we recommend reaching out to your navigator.

If you have general questions about what a degree audit is and how it impacts graduation, please visit our Degree Audit General Info page

HOW DO I… ?

Run a new audit

1: Log into myOTC and select: Student Planning

Student Planning button highlighted

2: Choose option 1: View your Degree Audit

View Degree Audit option highlighted

3: Click the blue Run Declared Programs button

  • If you are active in more than one program, an audit will be generated for each one.
  • If the Degree Program listed is not correct or you wish to change it, please complete a Change of Program form

Run Declared Programs button highlighted

4: Click on the View Audit link on the far right to view the audit

View Audit link highlighted

Optional: Advanced Settings

Advanced Settings allows you to modify the default settings when generating an audit; you can generate an audit without In Progress coursework or with Planned coursework

1: Select Click to view available options to expand the section
2. Make your settings selections
3. Click the blue
Run Declared Programs button

Advanced Settings option highlighted

PDF Download

Run a 'What If' audit

1: Log into myOTC and select: Student Planning

Student Planning button highlighted

2: Choose option 1: View Your Degree Audit

View Degree Audit option highlighted

3: Click Select a Different Program from the Request an Audit page to expand the section

4: Choose a Program from the alphabetical list

5: Select the Catalog Year

  • Please ensure that you select the CURRENT academic year; selecting a previous or future catalog year could result in incorrect requirements

6: Click the blue Run a Different Program button

Run A Different Program button highlighted

NOTE:
On the Completed Audit Requests page, What-If audits will be indicated in the Audit Type column. Please remember that ‘What-If’ audits are not used for graduation eligibility, advisor assignments, or financial aid.


Optional: Advanced Settings

Advanced Settings allows you to modify the default settings when generating an audit; you can generate an audit without In Progress coursework or with Planned coursework

1: Select Click to view available options to expand the section
2. Make your settings selections
3. Click the blue
Run Declared Programs button

Advanced Settings option highlighted

PDF Download

Schedule classes from my audit

PART 1: ADDING THE COURSE TO YOUR SCHEDULE

Adding classes to your schedule does not register you for those courses; for help registering see: Register for Classes

1: Open the requirement: To open all requirements on your audit, select Open All Sections; if you want to only see the requirement that has the class you want to schedule, click on the requirement title.

Don’t forget that as you complete requirements, you can also choose to filter your audit to show only unmet requirements. See: ‘Understand and use the graphs and charts‘ for more information.

Open all or one requirement

2: Select the class you are interested in: Click on the underlined course. A ‘Course Catalog Details’ box will pop-up and you will be able to see the course title and description.

If you decide this is not the class you want, simply click the Cancel button to close the dialogue box and select a different course. 

3: Click the Schedule Course button

This will take you back to myOTC in a new tab

Select schedule course button

Make sure you see your username in the myOTC menu bar; if not, select Sign In

Check username

OR

SIgn in

4: Select the Add Course to Schedule button

You will be able to choose a section later from your calendar on the ‘View Plan and Register’ page of myOTC. See: ‘Register for classes’ help guide

Alternately, you can select a section from the View Available Sections for… drop down.

Add course to schedule

5. Confirm your course and choose a term: Choose the appropriate term from the Term drop down menu and select: Add Course to Schedule

Make sure you verify the Course Details (don’t forget to pay attention to any Requisites that might be required).

Confirm and select

PART 2: SELECTING A SECTION

1: Return to Student Planning: From the ‘breadcrumb’ menu in the upper left, select Academics > Student Planning.

Academics > Student Planning

1A: Select Go to Plan & Register

Go to plan & register

2: Go to the term you are scheduling: The default term will be the current term; toggle the arrows to select the correct registration term

Toggle to the correct term

2A: Use your filters!

Filters can help make sure only the sections you want to see display to you. Using the filters is optional, but we always recommend using the Location filter. 

Use your filters

3: Choosing a section: click View other sections to view the sections for each course on your schedule one at a time.

What is a section? Sections determine things like when (day and time), where (what campus), and how (seated, online) the course is taught. The section is the sequence of letters and/or numbers after the course code: ENG-101-103

View other sections

3A: Use the arrows to toggle through the listed sections until you find one that fits your schedule

The sections will display on your calendar view allowing you to see if the sections you are viewing conflict with any courses you may have already selected.

Online courses are listed below the calendar under the ‘Sections with no meeting time’ header

Toggle ssections

3B: Once you have chosen a section, click the section card to confirm

Click the section card

4: Add section: Verify the section details; once you have confirmed the details, select: Add section

Ensure that you check the highlighted areas shown here to ensure that you are registering for a section that is located where you expect and during the dates you expect. The additional information section will display any additional section specific information about the course.

Add section

Once you have selected a section for all courses on your schedule, you are ready to register. For help registering, please see the Register for Courses help guide

PDF Download

Register for scheduled courses

Once you have created your schedule by selecting sections, you are ready to register.

1: Register: You will see a blue ‘Register’ button on each course card, and a blue ‘Register Now’ button in the upper right.

  • The Register Now button will register all course sections at the same time. This ensures that all scheduled sections are registered.
  • The Register button on the course card allows you to register each course individually. If any of your classes have co-requisites (courses that must be taken at the same time) this method will not work.

Register for classes

THINGS TO REMEMBER:

If you have any registration errors (registration is not open, you don’t meet the requisites or registration rules) you will be notified by a yellow alert banner in your notification center located in the upper right hand corner of your screen

yellow banner

If your course has a button that says ‘Waitlist’ instead of ‘Register’ then there are no open seats but you can choose to enroll in the waitlist for the course. For additional information on waitlisting and how this process works, please visit the Registrar’s Waitlisting page.

Waitlisting

Once you have registered, you will see a green banner under the course title displaying ‘Registered, but not started’. The ‘Register’ button on the course card will change to ‘Drop’. You will use this button if you need to change your schedule or drop a course. The ‘Register Now’ button on the upper right will not change

Registered not started

Your registration is not complete until you set up your payment plan. You will be notified of this with a red banner. Use the ‘Access My Payment Plan’ button to complete your registration. This step must be completed the same day as your registration, every semester, regardless of financial aid status. If you do not set up your payment plan, you will be removed from your classes.

Payment plan

PDF Download

Understand my progress

Your audit is comprised of a list of Requirements; within each Requirement will be one or more Subrequirements. Each Requirement and Subrequirement will display a status icon indicating your progress.

In order to meet graduation eligibility for your Program of Study, each Requirement (and Subrequirement) must show a status of ‘Complete’.


EXAMPLE: The AA.GEN is comprised of 10 Requirements. Each Requirement section can be expanded to view the Subrequirements

Requirements

Requirement/Subrequirement expanded


PROGRESS STATUSES

Complete Icon

  • Indicates all courses and hours within the Requirement or Subrequirement have been met and the section is completed. No further coursework or hours are needed.
  • All Requirements must show a Complete status after final grades are submitted in the student’s last semester in order for the student to be eligible to graduate.

Unfulfilled Icon

  • At the Requirement level, this status indicates one or more Subrequirements have not been met. Additional coursework or hours are needed.
  • At the Subrequirement level, this status indicates one or more courses or credit hours is still needed to fulfill the Subrequirement. Additional coursework or hours are needed.

In Progress Icon

  • Indicates the Requirement or Subrequirement will be complete pending the successful completion of in-progress coursework. If the in-progress coursework is not successfully completed, the status will revert to Unfulfilled.

Planned Icon

  • Indicates that the Requirement or Subrequirement will be complete if the student successfully follows their academic plan of anticipated coursework. This status will change to In Progress and Complete as coursework is taken and successfully completed.
PDF Download

Run my audit with planned classes

Planned classes (also referred to as ‘What If’ classes) are classes that you have not yet registered or completed but plan to complete in the future. Running an audit with these classes allows you to see how your progress will be impacted if you complete them.

It is not recommended that you regularly included planned classes when generating a degree audit as this will prevent you from viewing your actual progress. When using the Degree Planner tool, an audit that includes your planned courses is generated automatically.

Please note: Classes planned in myOTC will not display on your degree audit. Please plan to create a new plan using the new degree planner. For help using the degree planner tool, see our Degree Planner Help Guides

Understand the symbols and icons

A legend is provided at the top of the audit in the ‘Help for Audit Results’ button; you can also find this information at the bottom of the audit

Help for Audit Results Legend indicated


LEGEND:

Legend Box

REQUIREMENTS & SUBREQUIREMENTS:

These icons display at the Requirement and Subrequirement level to indicate your current progress. Subrequirement progress is based on the completion status of all course(s) and hours listed within the subrequirement; Requirement progress is based on the completion status of all Subrequirements listed within the Requirement

COURSE CODES

These codes display after the letter grade on the far right of the course line. They indicate additional information about the course listed. Only one course code can be displayed per course.

Course Code Example

SPECIAL GRADES

These codes are used for Transfer grades or as status indicators for courses that have not been completed.

Special Grades Example

PDF Download

Understand and use the graphs and charts

At the top of your audit you will see several graphs and charts that can show you your progress at a glance. Some of these graphs are interactive and can be used to filter your audit.

Chart Color Display Help*if your charts are not displaying the colors indicated in the images here, you can toggle this displaying using the blue ‘Select Your Style’ balls in the top right corner. If these do not resolve your issues, we recommend using a different browser.

Audit bars and charts

AUDIT:

The Hours pie chart under the Audit header shows an overview of progress towards the completion of the total required hours for your program.

The GPA bar graphs show you your current GPA on a 4.0 scale.

Audit Pie Chart

CATEGORIES:

*display categories will vary depending on program

Categories are assigned to Requirements. The Categories bar graph provides an overview of the progress made towards the total required hours in each listed category. Categories are clickable and will provide a breakdown of all Requirements included in the Category. You may also detail further into a Requirement to see a breakdown of Subrequirements.

Categories chart displayed

Selecting the “General Educ.” bar from the Category options provides the following Requirement breakdown:

Requirements shown filtered by category

Selecting the “CORE42 Written Comm” bar from the Requirements options provides the following Subrequirement breakdown:

Subrequirements chart displayed

To return to the full audit, use the Breadcrumb trail located above the pie chart:

Breacrumb menu


FILTER BY REQUIREMENT STATUS:

You may select any status to filter the audit to display only the Requirements that have the selected status. This does not filter Subrequirement status

*please note, that the Requirement progress (Complete, In-Progress, etc) is determined by the completion status of the Subrequirements within the Requirement. If one Subrequirement is Unfulfilled (red), the Requirement will also show Unfulfilled.

Requirement status filters

PDF Download

View previously run audits

From the audit menu dropdown, you can select one of the following: Request New or Manage.

Request New and Manage options highlighted

Manage will take you to the Completed Audit Requests page where you can view all audits generated that day. The audit list is cleared out each night, so if you do not see your previously generated audit, click the ‘Run Audit’ button to generate a new one! If you have made any registration changes since your last audit was run, it is recommended that you run a new audit.

Request New will take you to the Request an Audit page where you can generate a new audit (or a What-If audit). This is recommended after changes in registration and at the end of the semester when final grades have been submitted.

Understand the audit header

The degree audit header located at the top of a generated audit displays information for that specific audit.

Audit Header Sections
Student ID:

Displays your student ID

Prepared On:

Displays the date and time the audit was generated. Any changes made to your academic record after that date/time will not be displayed until you run a new audit

Program Code:

This is the internal code identifier and an abbreviation for your Program of Study

Catalog Year:

This is the academic catalog being used to determine your graduation requirements

WHAT IS…?

A degree audit

A Degree Audit (sometimes referred to as simply “audit”) is a tool that helps you and your navigator understand the overall requirements for your active Program of Study and track your progress towards completing those requirements. Your Degree Audit is also used by the Registrar’s office to determine graduation eligibility.

Course History

Your Course History provides a bar graph and a list of your completed, in progress, and planned coursework. The list can be sorted by column (Term, Course Term, Course, Hours, and Grade) or Filtered by grade and/or term. 

Course History tab

Excess Courses

The Excess Courses area is located at the end of your degree audit. This section is not required and cannot be completed. It displays any courses on your academic record that are not actively meeting any program requirements.

Institutional courses (courses taken at OTC) listed in this section will, however, contribute to your Institutional GPA and Residency requirement.

If you feel a course displaying in Excess Courses should be meeting a course requirement, please contact your navigator or program director for assistance.

Excess courses highlighted

Applied Exceptions

Exceptions at OTC are rare; they are modifications to the requirements stipulated in the Academic Catalog. These are applied in special circumstances with the approval of a department chair or dean.

Applied exceptions will be notated in your audit results; you can also view any applied exceptions in the ‘Applied Exceptions’ tab

If you have additional questions about exceptions, please contact your navigator.

Some helpful terminology

CORE42

The Missouri Department of Higher Education (MDHE) has identified a common set of general education courses.  These courses are the “CORE 42”. CORE 42 courses are guaranteed to transfer to any Missouri public college or university to satisfy general education requirements. For more information please visit: https://dhewd.mo.gov/core42.php

Catalog Year:

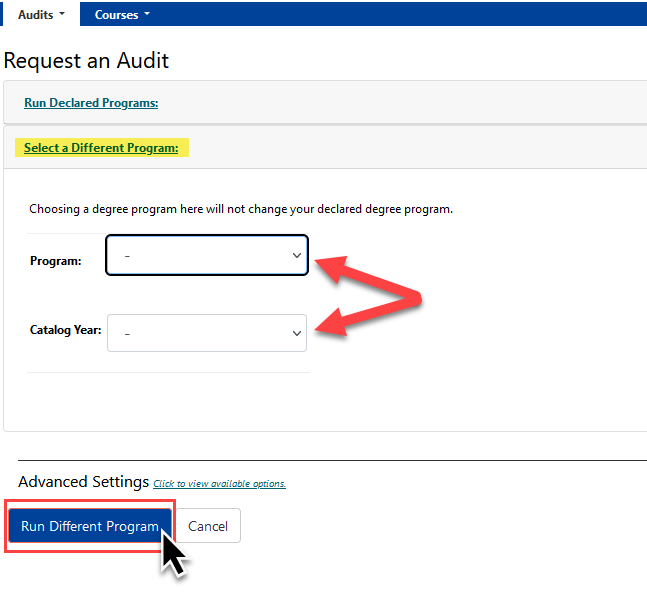
Determines the specific graduation requirements for your Program of Study. Students are expected to follow the curriculum requirements indicated in the corresponding Academic Catalog for their Catalog Year.

Category:

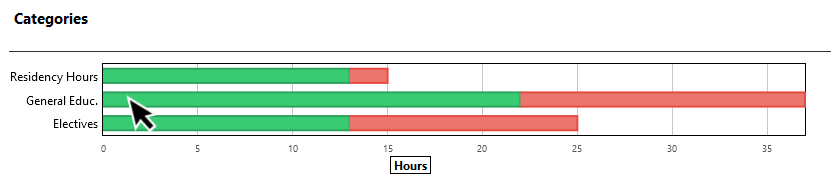
This is a term you will see on your degree audit; Requirements are divided into Categories such as General Education, Program Courses, Electives, etc. to help indicate which Requirements have shared characteristics.
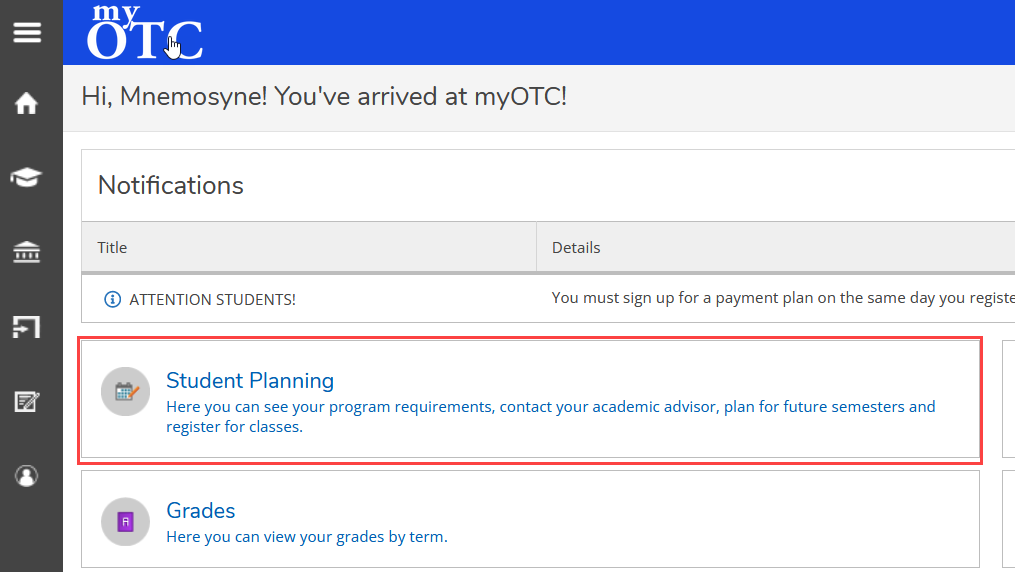
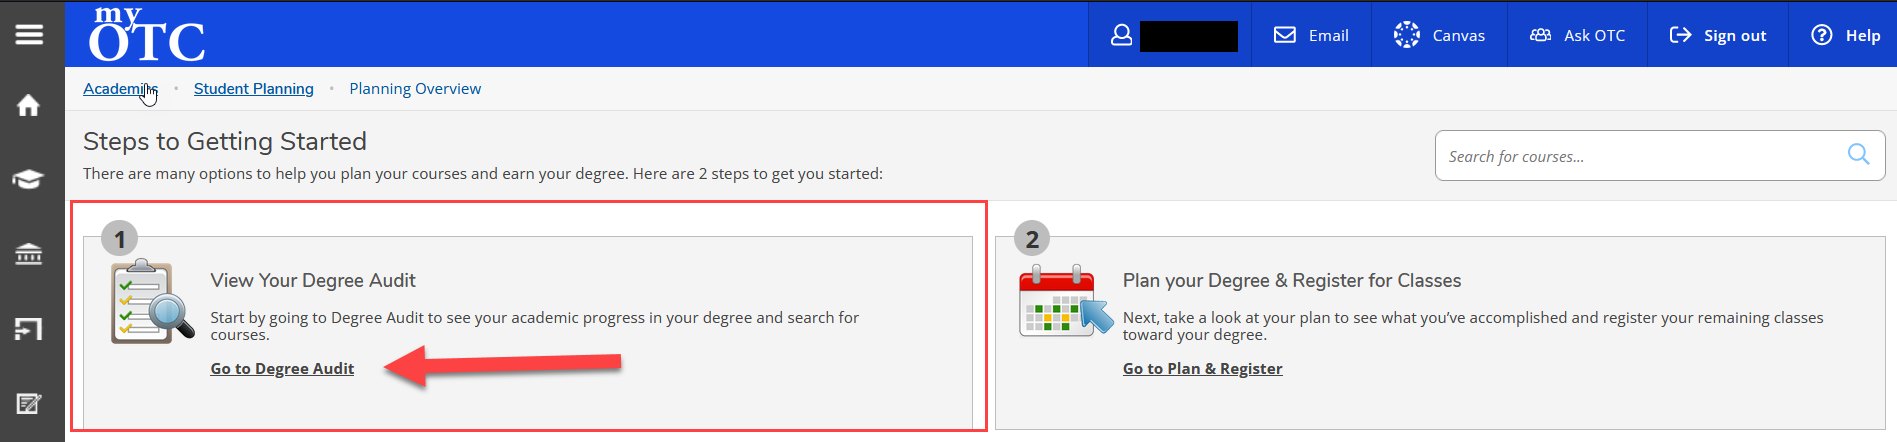
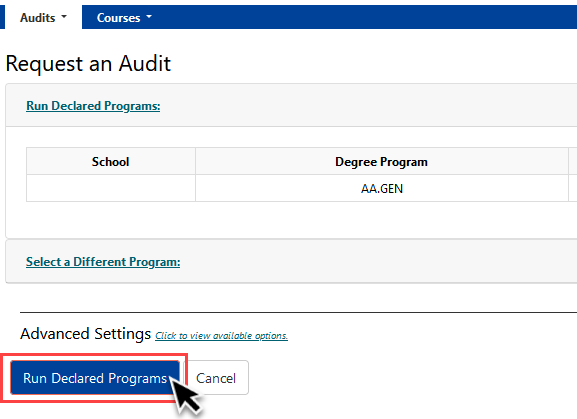
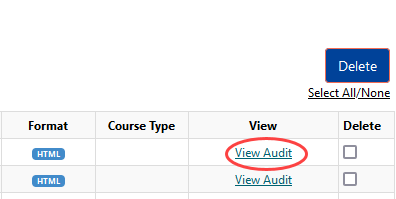
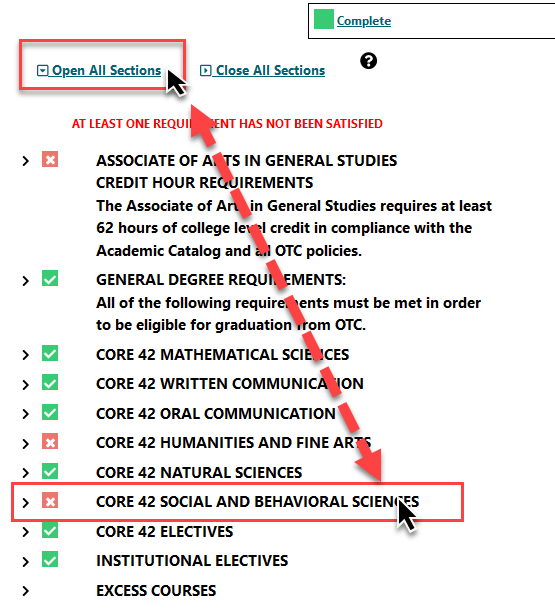
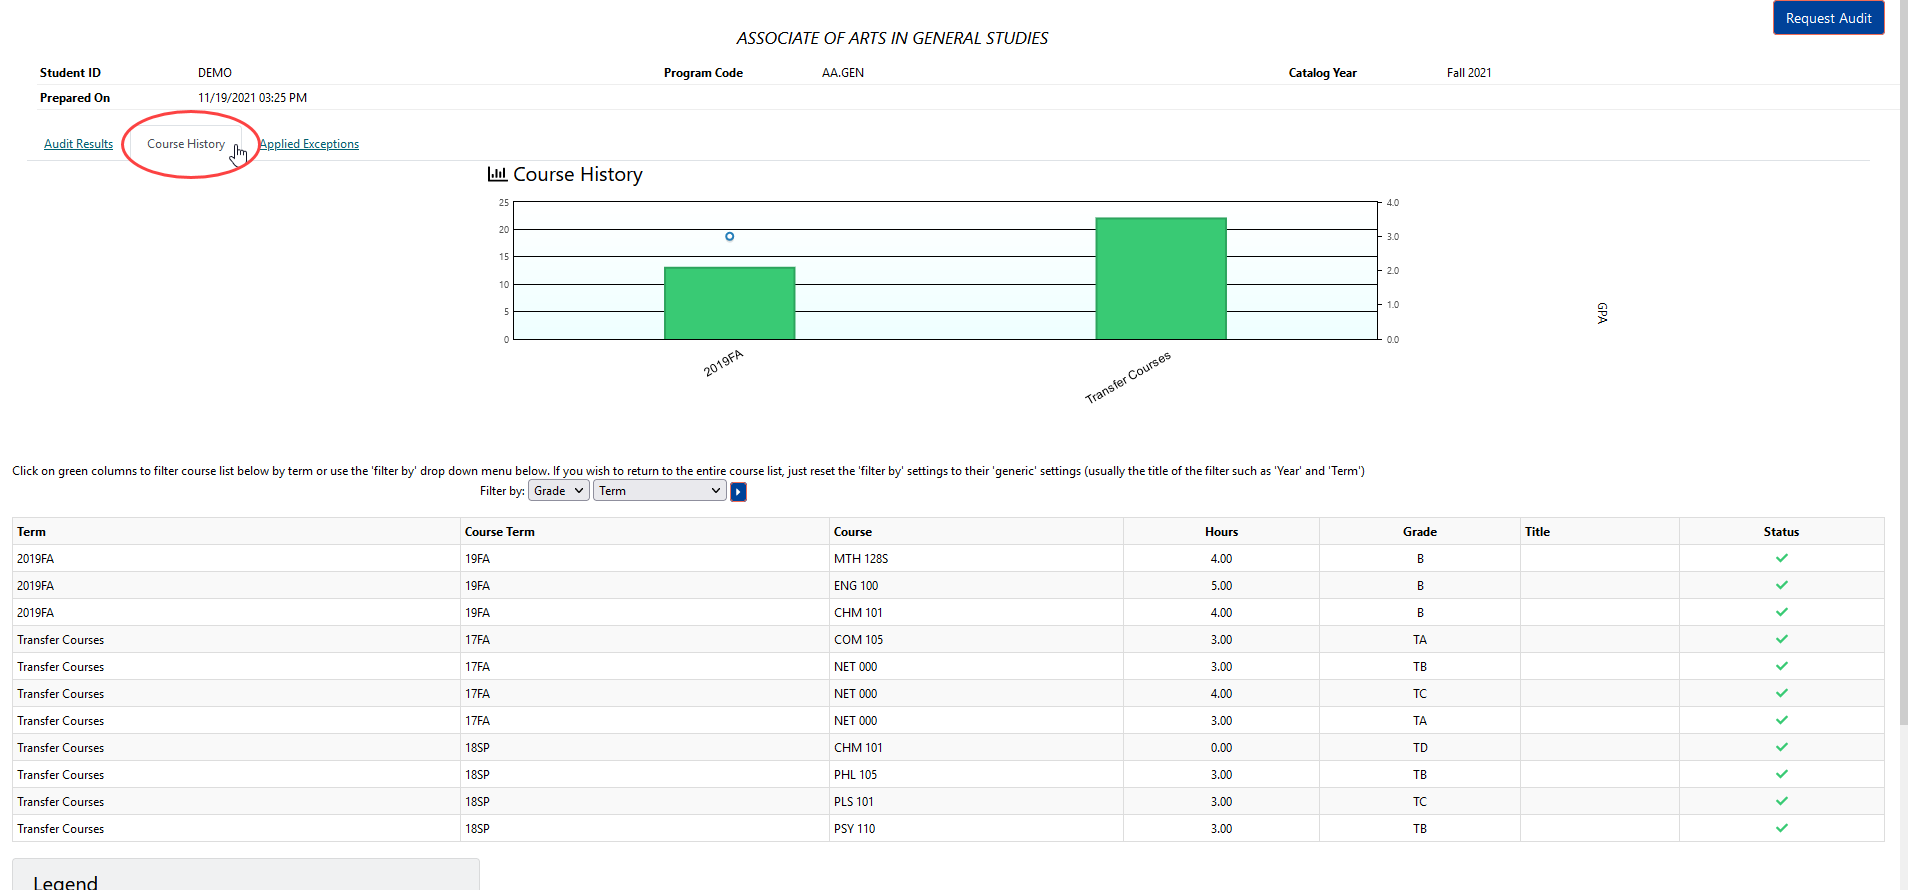
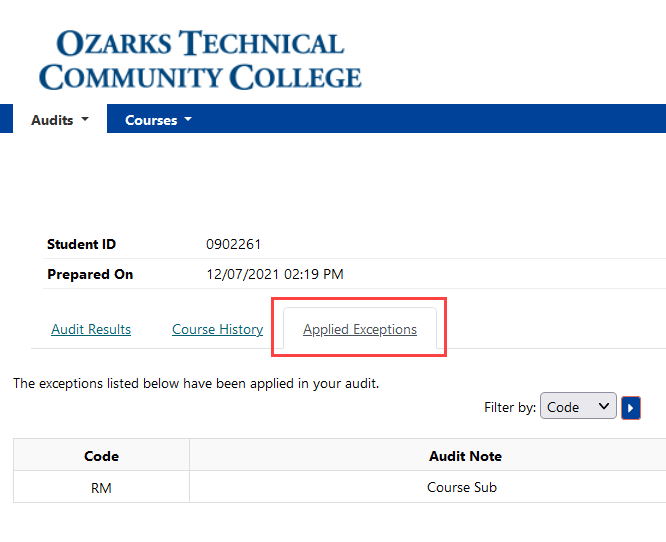
Degree Audit:

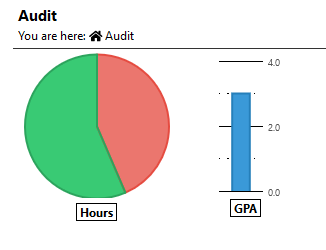
A degree audit is a tool that helps you (and your navigator) understand the overall requirements for your active program of study and track your progress towards completing those requirements.
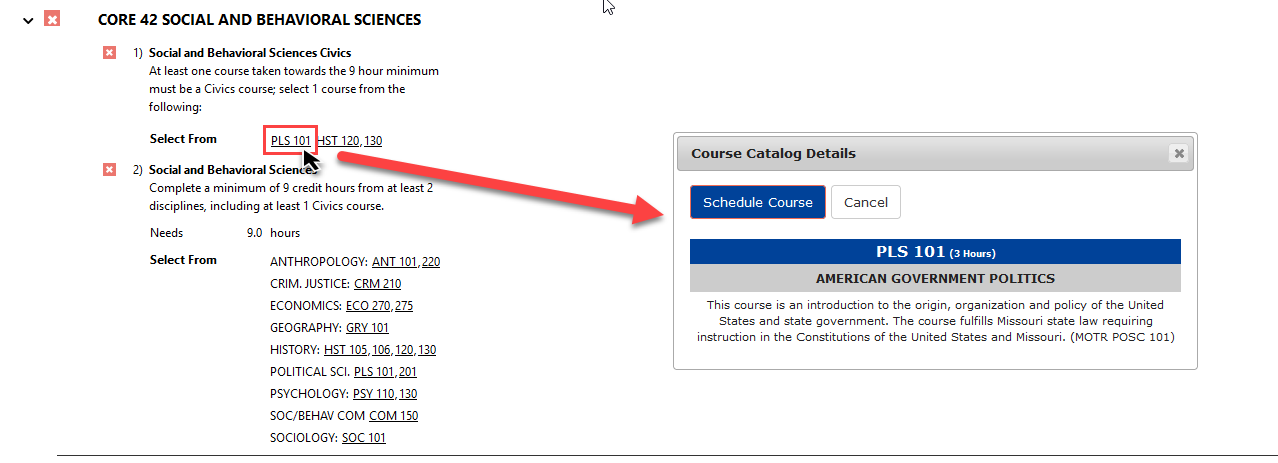
Discipline

A discipline is a subject category defined by CORE 42 to determine how Social & Behavioral Science, Natural Science, and Humanities & Fine Arts Knowledge Areas can be met. Information on the Disciplines identified in these Knowledge Areas can be found here: https://dhewd.mo.gov/documents/CORE42ColorCourseMatrix4_27_21.pdf

Knowledge Area

Knowledge Area is a CORE42 term that identifies the 5 areas of competency required by the State of Missouri to meet the CORE42 framework for general education. They are: Social & Behavioral Science, Communications (Oral & Written), Natural Sciences, Mathematical Sciences, and Humanities & Fine Arts.

Program of Study:

Similar to what might be referred to as a ‘Major’. This is the declared academic program at OTC that you are actively working to complete. This is used for: financial aid, navigator assignments, graduation eligibility, etc.
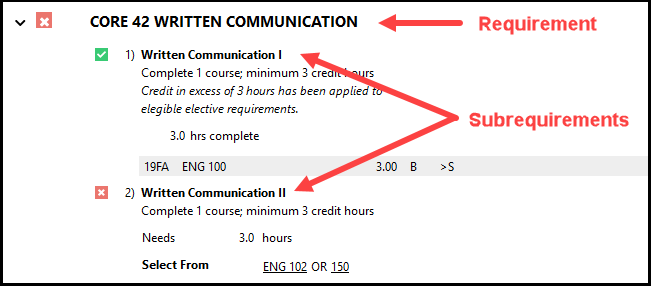
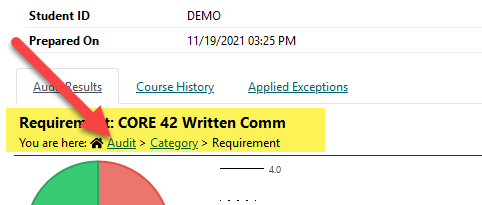
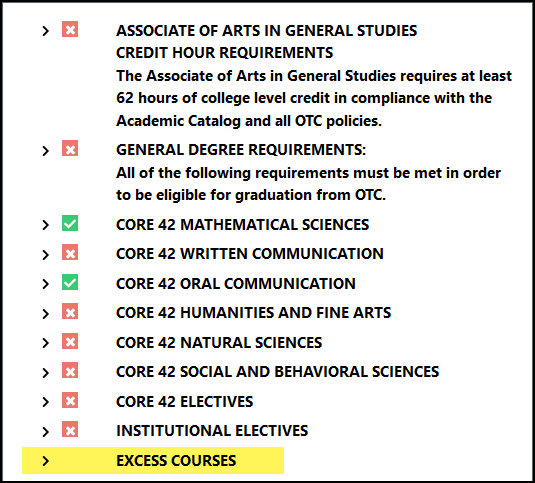
Requirement

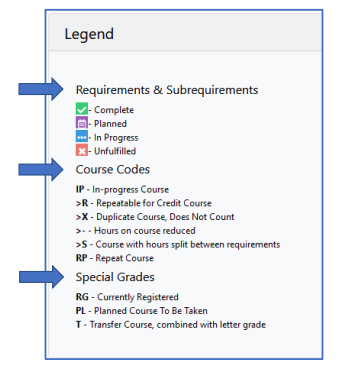
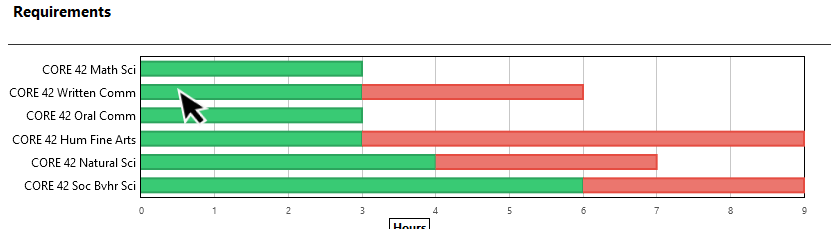
This is a term you will see on your degree audit; a Requirement is a block of one or more Subrequirements that must be completed for graduation; your audit will display all Requirements needed for your program and the current status of each (Complete, Unfulfilled, In Progress, Planned).

Subrequirement

This is a term you will see on your degree audit; a Subrequirement is a block of one or more courses (and the required credit hours) within a Requirement that are required for your Program of Study.

PDF Download

As of: 09/15/2022